Non Precsion Approach Page 4
When and how do I make my turn onto the arc?
In order to gauge the turn on to the arc we need to 'lead the turn'. If we waited until 10 nm before we started the turn then we would be well inside the arc. The faster we go the greater the radius of turn so we need an easy method of working out a lead distance. We do this by dividing our GS by 10.
180 kts / 10 = 1.8 nm
200 kts / 10 = 2 nm
240 kts / 10 = 2.4 nm
Add these figures to the arc radius.
So in our example if we are descending at 240 kts we would turn left at 10 + 2.4 = 12.4 nm.
Calculating the turn
As for the degree of turn you can either calculate it:
Inbound track is 118 degrees and we turn left 90 degrees which will make for an initial heading of:
118 – 90 = 028.
Or an easier method is to look at the RMI (Radio magnetic indicator which has a VOR needle like an ADF and points at the station. The tail will always indicate the radial you are on) and turn the aircraft until the VOR needle is out to the right at the 90 degree relative position.
After the turn monitor the DME distance and the RMI needle. If the needle is behind the 90 degree relative point then you will be increasing the arc radius and if it is before the 90 degree point you will be decreasing the arc radius. This is of course in still air as wind will cause a drift angle that you will need to make an allowance for. Ideally in still air conditions if you are at 10 nm you could apply a very small amount of bank and as long as the needle stayed out to the right at 90 degrees relative you would maintain the 10 nm arc. Realistically we just take a few bites at the heading as we fly around the arc. If we are inside the arc then we just maintain the heading with the VOR needle out at 90 degrees or more and watch the DME distance count up to 10 again where upon we will turn right until the needle is 90 degrees or just before, roll out and maintain that heading. If we are outside the arc then we need to make a larger turn inwards to the centre and make sure that the needle is at a relative angle of less than 90 degrees. Remember that if you are tangential then the arc is always turning away from you (as opposed to inside where it is turning towards you) so you need a much larger corrective heading when out side of the arc than when inside. When the distance has closed into the correct value then turn away until the needle is back at the 90 degree relative point or slightly less. Your track around the arc should consist of constant small turns to maintain as close as possible the 10 nm. Don’t over fixate on it though or you will end up forgetting something else….like keeping the descent going or mentally calculating (picturing) your position on the arc.
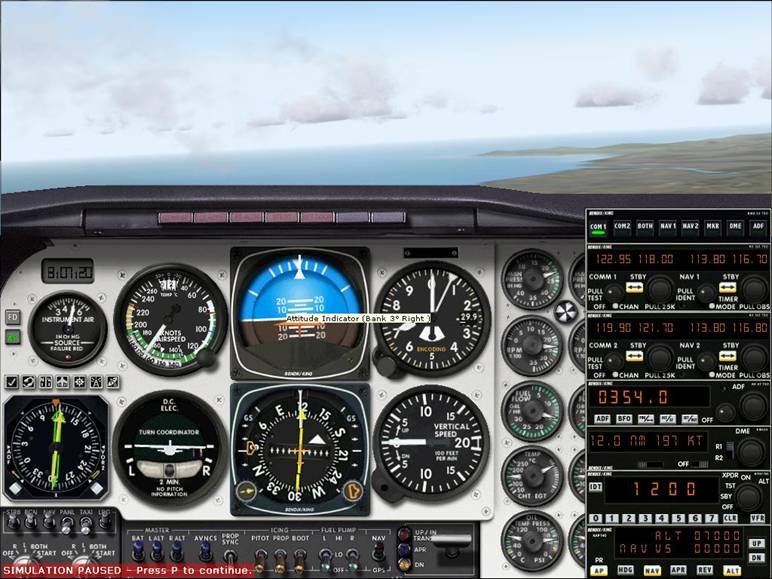
Even though this B58 Baron is not pressurised I have flown it as if it was for the purpose of the exercise. The panel is simple and easy to read.

Here we are about to start the turn to join the arc. Note the groundspeed is 197 kts (near enough to 200) so at 12 nm’s we turn left. I have set the HDG bug so that all I have to do is press HDG on the autopilot and it will turn. We are at 7000ft.

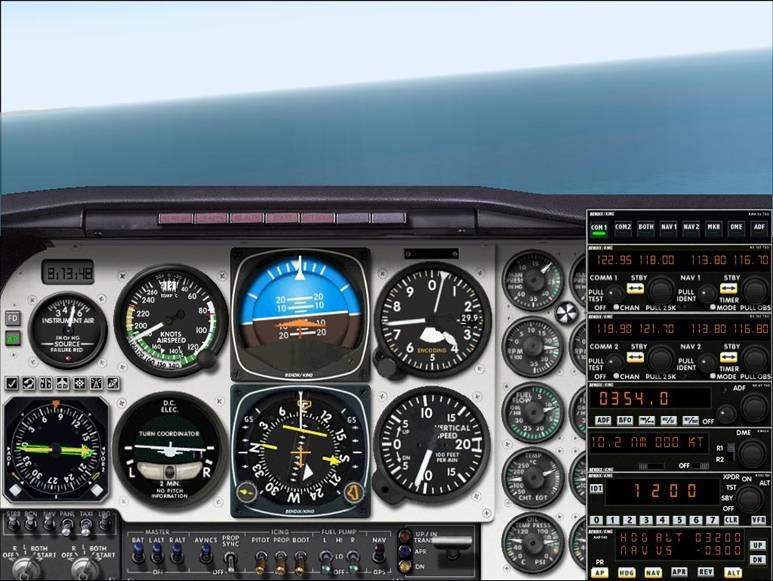
Here we are on the arc. In this case I let the autopilot do its own turn and you can see that after the 90 degree turn we are 10.3 nm. If you look at the green needle on the RMI (pointing to NR VOR) you can see that it is slightly behind the 90 degree point. This means we will now start to increase the ARC distance. 10.3 mls is within the 1 nm tolerance but we can do better and if we don’t turn soon we will increase the ARC distance further. Note the tail of the green needle is indicating about 305. This means we are crossing the NR 305 radial. As we are on the ARC we can set our altitude in the alerter/ autopilot down to 3700 ft. Note also the groundspeed on the DME is nearly zero. This is because we are tangential to the DME and it can only give an accurate groundspeed when you are either tracking directly towards or away from it.
Once established on the arc you can descend to not below the published sector altitudes. This will provide you with a minimum of 1000ft terrain clearance as long as you are within 2.5 miles of the arc. You should be aiming to maintain the arc to =/- 1 nm (9nm to 11 nm in this case).
Monitor your RMI (tail of the needle) or set up the limiting outbound radials, on the OBS of whatever VOR instrument you happen to have, so as to confirm crossing the radials. The first one we will set up is 315R and when we cross that the 345R.

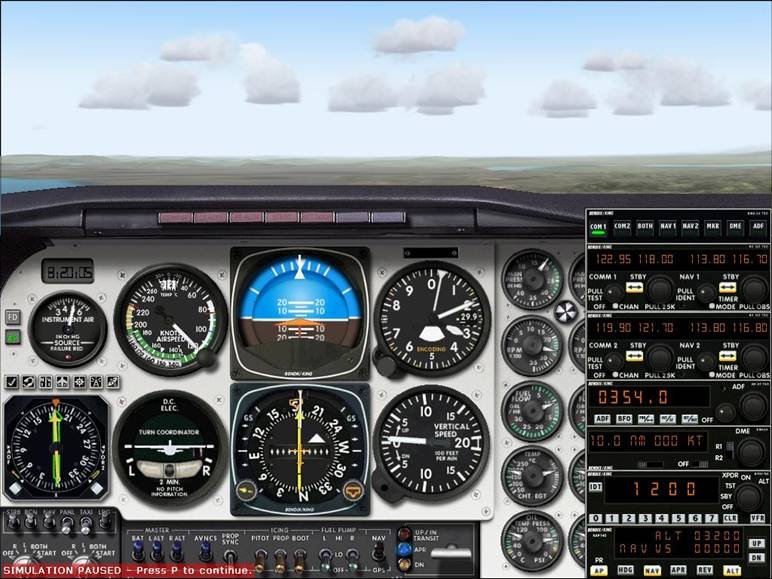
Here if we look at the tail of the green needle we can see that we have just crossed the 315 radial (almost at the 320 point). At this time I have also set the inbound course (185) on the HSI. You can spot my error with the altitude setting. It should have been 3700 ft. Note that the DME distance has come into 10.1 nm and the green needle is at 90 degrees. Time for another little 10 degree turn to the right before the distance starts to open up.
I can also set the altitude to the next limit which is 3300 ft on this section of the arc.

Here we are just crossing the 345 radial (tail of the green needle). The distance is spot on and we can see by looking at the HSI that we are almost 90 degrees to the final approach course. This should be a clue that we are almost at the inbound course. How is my altitude? Hmmm not bad. I have about 20 degrees of arc left which is about 3 nm (divide by 6 remember) and I need to lose 1000 ft. Maybe I might just increase the rate of descent a little so that I don’t end up too high. I also need to start reducing airspeed so I will reduce my power setting too.
Most arcs publish a lead radial so as to assist you turning onto the inbound course and hopefully prevent you from flying thru it. These lead radials should give you at least 2 nm of lead so will work well up to 200kts groundspeed. If you look at our Napier chart you will see the lead bearing for us is the NR 353 radial. As the inbd is on the 005 we get:
005-353= 12 degrees (and using the divisor of 6 for a 10 nm arc)
12/6 = 2nm of lead.
Set up the lead radial. The best method is to use the RMI if so equipped as there is nothing to set….just read. Otherwise I would prefer to have the HSI set up to the inbound course, as soon as possible after joining the arc, and use NAV2 to select the crossing radials. At least then if you make a cock up setting up a crossing radial (ie set 180 degrees out which is easily done) the inbound course is still set and if it starts moving then it will alert you to the fact that not all is well! A safety net so to speak.

Looking at the tail of the green needle we can see that we have crossed the 355 lead radial. Also note that the CDI (course deviation indicator) on the HSI has started to move. My speed is still on the high side and I need to increase my rate of descent (distracted by capturing screen shots!!)
Flying the final approach
The aim is to be established on final approach and in the correct configuration (flap/gear) for the approach. This is entirely up to you as to how you do this but I would suggest that you be configured with at least an intermediate or approach flap setting. For a 737 this might be Flap15. You may want to have the gear down at this point to assist you in maintaining the desired descent rate. It all depends on how “slippery” your aircraft is as well as how far you have to track inbound and with what sort of groundspeed. No point being in a C172 with 10 nm to run with a groundspeed of 70 kts and full flap!!!! You will need to stop for lunch before you get there!

Established at 10 nm and on the inbd course at the correct altitude and on speed (not thru good eng handling though!) Now is the time to set the altitude down to 400 ft (nearest 100 ft below MDA or MDA if an even 100 increment as in this case)

